basil pesto

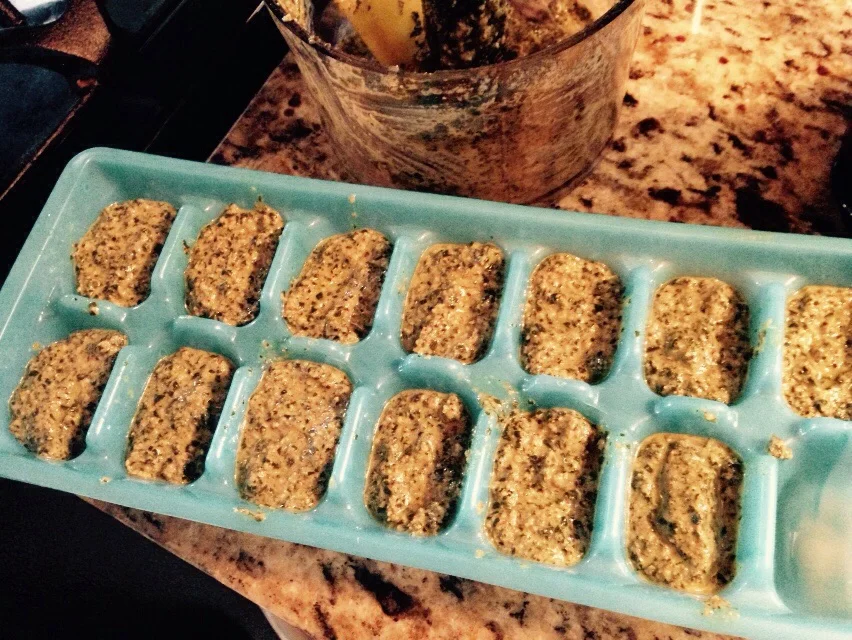
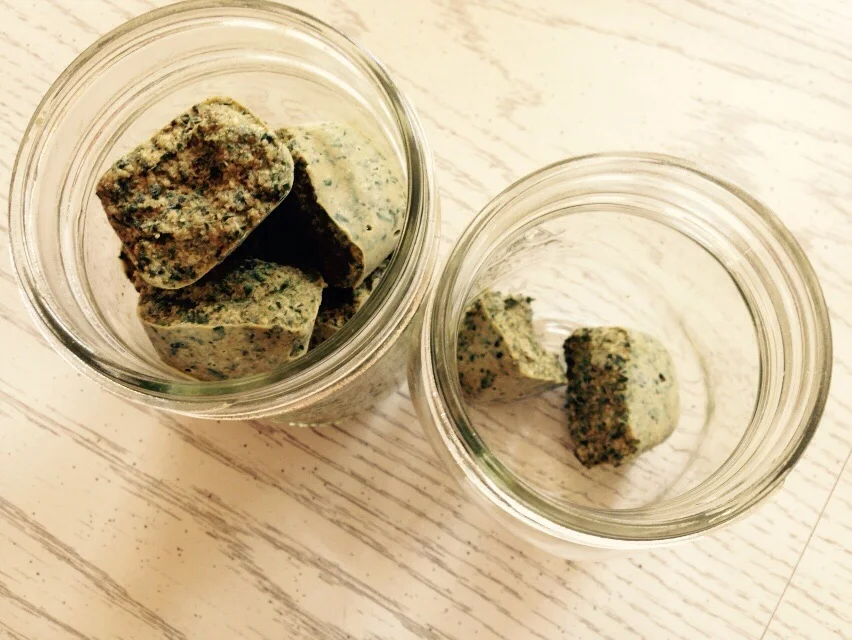
Herbs have been making their way into the kitchen in fistfuls and basketfuls over the past several weeks.  My first batch of oregano has been dried, crushed, and stored away for the months ahead.  A small batch of thyme is now ready to crush and put in a jar and a bit of peppermint is now hanging in the kitchen window.  Finally my basil plants were ready this week to cut back for my first batch of pesto.  I love to make pesto a few times during the summer, freeze it in ice cube trays, and then move it into containers in the freezer.  I've found that ice cube-sized pesto is the perfect amount to add to any recipe.  It's just the right amount for my favorite grilled pesto, provolone, and red pepper sandwich and just a few cubes are needed for a batch of pasta or gnocchi for a dinner for two.  

image.jpg

There are so very many pesto recipes out there, and mine is nothing new or revolutionary.  However, I do like to use walnuts instead of pine nuts in my version.  I like the darker nutty flavor that walnuts give the pesto and they are also cheaper, which is a great bonus.  I also usually have walnuts on hand, whereas pine nuts I do not.  So, if you're looking for a new recipe to try...here you go!  Most pesto recipes call for parmesan, but since I freeze mine, I don't add any parmesan to the pesto.  Instead, I usually add parmesan, or another type of cheese, to the dish that I'm adding the pesto to.  I find that this just works better for the way I cook and simplifies what's needed to make the pesto, which I'm all about.  

image.jpg

Basil Pesto 

1/2 cup walnuts

1/2 cup olive oil

2 cloves garlic

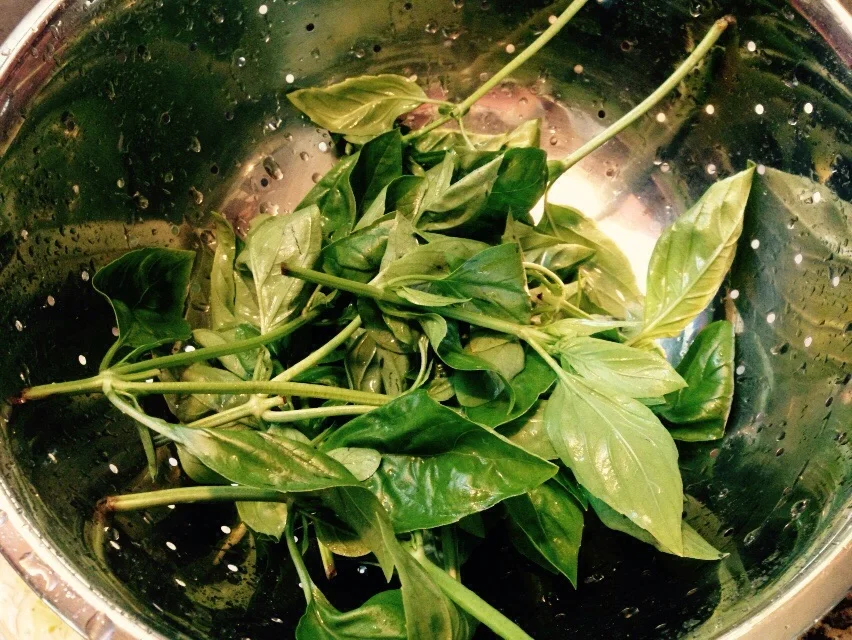
2 cups packed fresh basil leaves

1 teaspoon lemon juice (fresh or bottled, but fresh is preferred)

1/2 teaspoon salt

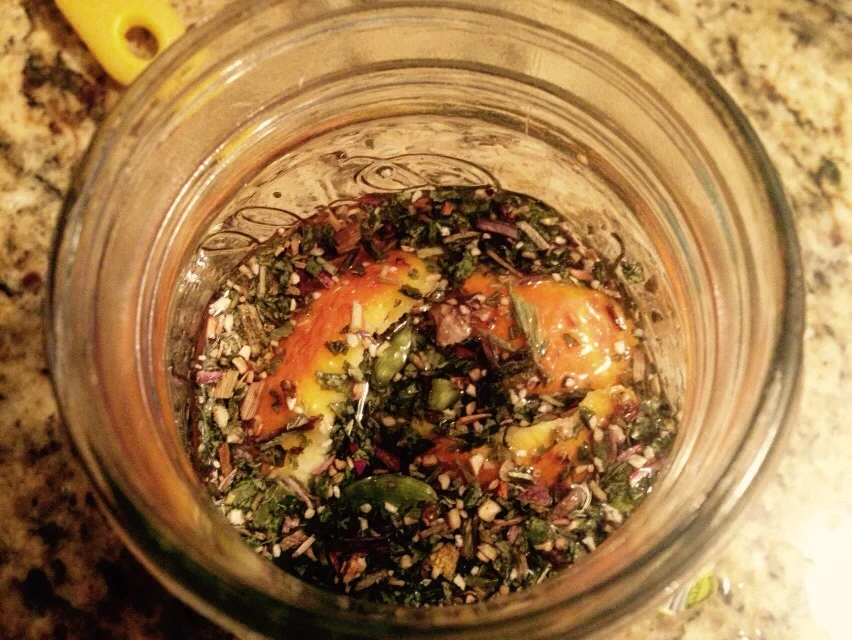
Add the walnuts and olive oil to a blender or food processor and blend until mostly smooth.  Add the garlic and blend until smooth.  Add the basil leaves, small amounts may be necessary depending on your blender/food processor.  Add the lemon juice and salt.  Processor until it reaches your preferred consistency.  I tend to leave mine a bit chunky.  Fill an ice cube tray with the pesto.  One batch should fill one ice cube tray (in the picture above I reserved a bit for my dinner that night so it didn't quite fill a tray).  Freeze until solid and then transfer into a freezer container or bag.  Keep in your freezer for up to a year and use as you need it!


image.jpg

How about you?? Do you have a favorite basil pesto or other herb pestos that you love??  I'd love to hear about them! 

fermented cucumbers and jalapeños

You know that team building game that people sometimes play where you have to choose what two foods you would want to live on for the rest of your life if you were stranded on a deserted island??  Well...one of my two foods has always been pickles.  I mean, really, if you're stranded on an island what better food to have with you!  They are shelf stable, they are a vegetable, and they are always delicious.  Yum.  My mouth waters every time I think about those sour crispy delectables.   

image.jpg

For the past few summers I've made a couple batches of traditional vinegar dill pickles--and I love them and wouldn't go without them.  But last year I also tried my hand at fermented dill pickles.  It was an experiment--as I've found all fermenting to be.  It's not an exact science the way that hot water or pressure canning is.  With canning you have to have just the right amount of food in the jars, the jars have to be closed just right, the temperature and/or pressure has to be just right, and you have to do it for just the right amount of time, but with fermenting it's totally different.  Your jar of cucumbers can be half full, you can have several different sizes of jars with different types of lids, you can ferment something for a week, two, five, twelve.  Every ferment is different and each one is a bit of an experiment with far too many variables to make it scientific---it's awesome!  Those are my favorite kinds of experiments.  It's like when you make a really delicious meal and your husband says, "Wow! This is amazing!  Can you make this more often?"  And you respond with, "Um...this exact thing?? Probably not.  I made it up."  That's kind of how fermenting works, at least for me.  

Another thing about fermented pickles is that they taste a bit different from their vinegary counterparts.  They are more sour and they are kind of bubbly.  They can make your face pucker and they can be incredibly addicting...but I do think they are a bit of an acquired taste.  If you've never made or really eaten homemade vinegar pickles, then tasting your first fermented pickle may be quite a shocker.  They are very different from the jars of pickles that line the grocery store isles.  However, if you are a homemade pickle lover, then I encourage you to try fermenting a batch.  The best part is that you can start with a little pint jar and if they don't turn out or you hate them, you can compost those babies without it being a big deal at all.  

The basics of fermenting cucumbers include packing pickling cucumbers (I get my mine at the farmers market) into a jar with pickling spices, garlic, and fresh dill, and then filling the jar with a brine of salt water.  You then tightly cover them and leave them in a warm place for a bit.  If your kitchen is warm (mine was in the 70's and 80's this week), then it may take just 5-7 days for the pickles to be ready.  If it's on the cooler side (consistently below 75) then it may take a few weeks for them to finish.  Once they have changed from bright cucumber green to dull pickle green and the liquid is bubbly and cloudy, then they are ready to taste.  When you bite into them, they should look pickled all the way through.  If they are still bright green in the middle--they are not done, or if they taste really salty they are not done.  When they get to the sour level of your liking and they are pickled all the way through---they are done!!  Hooray!  Then you can wipe down the jars (in case they've dripped a bit in the fermenting process) and move them into the refrigerator where they'll keep for 6 months to a year.  So easy and so good!

Also, adding traditional fermented foods to your diet can be so good for you!  Unfiltered and unpasteurized fermented foods are full probiotics that help to build a healthy gut flora.  Stop buying those expensive probiotic supplements and start eating fermented pickles and you'll be set!! I wrote a bit more about this in a post last summer, if you're wanting to find out more.  

If you are looking for a recipe to get you started with fermenting cucumbers, this Nourished Kitchen recipe looks like a good one.  The one I used this time around is from The New Midwestern Table by Amy Thielen.  It's a fabulous cookbook that includes so many great updated traditional midwestern recipes, which is great if you want to cook using local and season ingredients.  I fall more in love with that cookbook each time I use it.  

For my fermented jalapeños, I just added some garlic and used the same salt water brine that I used for the cucumbers.  They take a bit longer to ferment (you can see the changing green colors in the picture above; once they are all the duller green color, I'll start checking them), but I find that fermenting them is a great way to preserve the handfuls of jalapeños that come in from our garden as I can ferment them as soon as I have a pint jar full.  

image.jpg

How about you??  Have you tried your hand at fermenting??  If so, what are some of your favorite things to ferment?  

spruced up and dandy gimlet

Well, as promised, I put all those spruce tips to work and came up with this lovely little spring cocktail!  I was even able to incorporate the Citrus Spiced Dandelion Bitters I finished making last week!  Together they make a cocktail that's light, refreshing, and just delightfully earthy!  I hope you enjoy it as much as we do! 

image.jpg

Spruced Up and Dandy Gimlet

2 oz gin

1/2 oz spruce tip syrup

2 lime slices, squeezed

soda water

1 dropper full (or a few dashes) of Citrus Spiced Dandelion Bitters

Mix syrup with gin and limes, add ice, soda water, and bitters.  Stir and enjoy.  


spruce tip creations

Some days are meant for little surprises.  Yesterday was such a day.  With rain lightly falling all morning and gloomy clouds hanging around, I was in need of a bit of a pick-me-up.  While I sat in the living room grading final essays for one of my classes, Dan went out to trim the neighbor's spruce tree that was hanging on our power line.  When I went out to see his progress I noticed the brightest little green tips on those branches and instantly realized that they were spruce tips and we had an abundance of them on our hands!  I've never really thought about spruce tips or their uses before this past week, but after seeing a few posts about the them on social media I was intrigued!  So, I grabbed my basket and began gathering them from the fallen branches.  Within a few short minutes I had a basket full of spruce tips and a mind that was spinning with ideas of what to do with them!

image.jpg
image.jpg
image.jpg
image.jpg

By the end of the evening, I had prepared three infusions and a spruce tip syrup!  The first infusion on the left is a kombucha, spruce tip, and rhubarb combination.  The middle one is a white wine fruit vinegar and the last is a spicy apple cider vinegar.  Both of the vinegar recipes are from Issue 7 :: Gather of Taproot Magazine. The syrup recipe can be found here (I let mine cook down a bit more and it darkened quite a bit).  A spruce tip cocktail recipe will hopefully follow soon! 

image.jpg

The ladies were equally excited about the spruce tips!  They love them!  And so their side of the yard is now adorned with several draping spruce branches for them to nibble on and hide under.  They happily approved!

It's so fun to start to see wild food growing all around us.  The more I learn, the more I want to learn, whether it's about wild herbs and plants, or bees and animals!  It's so much fun!  Cheers to all of the spring foragers and gatherers out there!  May your adventures be bountiful! 

sleepy time tea

As I mentioned back in February, I've been diving into the world of herbs!  I've learned so much over the past couple months, yet still have so much to learn!  I've mostly been experimenting with herbal teas--both for medicinal purposes and everyday uses--and what I've found is that some of the herbs are so very easy to incorporate into everyday life!  My favorite everyday blend that I've created so far has been my Sleepy Time blend.  There is nothing quite like a warm cup of tea to help you wind down after a long day or a full evening--especially when the tea puts relaxing herbs to use like chamomile and lavender.  


Sleepy Time Tea :: helps calm and relax the body before bed 

2 parts chamomile flowers

1 part peppermint leaves

1 part spearmint leaves

1/2 part licorice root*

1/2 part lavender flowers

Mix together and store in an airtight container.  Use 1-2 teaspoons per cup of boiling water.  Steep for about 5 minutes.  Enjoy!

*omit the licorice root if pregnant


The best part about blending herbal teas, is that you can experiment with your own ratios--if the flavor is not to your liking, then mix it up and add a bit more of what you like.  It's so very easy.  And if sourced from the right place, it can be ever so affordable (far less expensive than using prepackaged tea bags)!!  I have been buying some of my herbs from our food co-op, but whatever I can't find there I've bought from Mountain Rose Herbs.  They are a great company, sourcing quality herbs and other herbal products. 

If you're looking for a good intro to herbs book, I've found Rosemary Gladstar's Medicinal Herbs for Beginners book very helpful as well!  

reusable living :: lunches

A couple weeks ago I started a new series entitled "Reusable Living."  We live in such a disposable society, I thought it would be interesting to share some of the ways that we try to use more sustainable options in our home as a way to inspire you to do the same.  If you missed the first post on cloth napkins, you can find it here.  Today, I thought I'd share a bit about my lunch routine.  

Now, we've all had cupboards filled with random Tupperware container and lids that don't seem to have a match.  And most of us have probably left them in our fridge (or the fridge at work) until the food inside of them has almost fully decomposed, right?!  And at some point in our culinary histories we've also probably just taken that plastic container full of who-knows-what and tossed it, the food, and the lid directly into the trash.  Well, maybe you haven't done those things, but I for sure have! Because let's face it, there's nothing quite as gross as reaching for a clean container only to realize that it still smells like whatever rotten food you recently cleaned out of it--even after going through the sanitation cycle in the dishwasher.  Gross and gross.  

On that note, don't be alarmed.  I'm not at all about to tell you to start bringing your lunches in plastic.  I am, however, going to tell you about my love for glass.  

When we got married, we registered for a couple sets of Rubbermaid's glass food containers and we threw away most of our plastic containers.  Since then, we've slowly gotten rid of most of the plastics in our kitchen that were used for food storage.  I still have a a few mixing bowls and such, but the day-to-day things we use are either glass or stainless.  Here are a few reasons why we try to avoid using plastics for food storage (find more info on this here):

  • They contain unknown (and in some cases known) levels of toxicity
  • Heat can break down plastics 
  • They are porous and can take on the scents and colors of the food they hold
  • They don't last very long

For all of these reasons, we've found that glass is the perfect alternative.  Toxic chemicals don't leach into your food through glass.  They can be heated and frozen without consequence (other than becoming more fragile when frozen).  They will not take on the scents and/or colors of food.  And, unless they break, they last for years and years.  Now, there are a few downsides to glass containers.  One, they are much heavier than plastic and this can be a problem for those (like me) who commute on foot, by bike, or just have to walk a long ways from their car to office.  The other downside is that they are breakable.  The first problem can easily be solved with a good lunch bag with sturdy handles.  The second has never been a problem for me.  I've broken far more drinking glasses in my day than glass food storage containers.  They tend to be made of pretty thick glass that is relatively break resistant.  

image.jpg

So, when it comes to lunches, here are a few of my favorite ways to transport food.  

  • Rubbermaid or Pyrex glass containers:  these are great for most lunch items--especially if you have a variety of sizes.  
  • Canning Jars (Ball/Kerr/or whatever):  these are the best option for soups and other liquids.  The metal lids are spill proof and you can eat/drink right out of the jars.
  • Bee's Wrap:  I love this stuff!  It's muslin fabric coated in beeswax and it can be used to wrap up a sandwich, veggies, slice of bread, cheese, etc.  You can wash it with cold water and soap and use it again and again!  I've even seen a few of our local shops start to carry it on their shelves.  It's great stuff!!  
  • Glass Water Bottles:  Dan and I both have water bottles from Lifefactory and we love them!  The silicone sleeves keep the glass safe (except if you leave it full of water in a freezing car over night...whoops...) and they are so very cute and functional!  
  • Cloth Napkins:  I keep a napkin in my lunch bag to use to cover my food in the microwave and wipe my mouth and fingers as I eat.  It stays in my bag until it needs a wash, then I switch it out for a clean one.  They are also great for wrapping up hard boiled eggs. 
image.jpg

There are so many disaposables out there designed specifically for lunches, but as I mentioned in my last Reusable Living post, I really don't think they make life all that easier.  Here are a few reasons why:

  • Using canning jars for food storage both at home and away from home means that I need less things in my cupboards that are used for different purposes, so it simplifies my kitchen cupboards.  
  • It takes just as much time to pack a lunch using disposables as it does reusables.  
  • The clean up is simple.  Rather than tossing things after lunch, I toss them back into my lunch bag and throw them in the dishwasher when I get home.  (Obviously, if you don't have a dishwasher, then hand washing is an added step.)
  • We don't run out of containers like we used to run out of ziplock bags.  Yes, sometimes they are all dirty or filled with other food, but that's a much easier problem to solve then when you reach for a bag only to realize that you're all out.  

Incorporating more sustainable lunch options into your routine doesn't have to be complicated or expensive--just slowly start to build your food storage options and be intentional about the containers you use to transport your food.  And trust me, glass is wonderful! 

pretty eggs

Having our very own chicken eggs during Easter, obviously meant that we needed to make our very own naturally dyed Easter eggs.  And so that is exactly what we did!  We ended up with golden yellow, using ground turmeric, and copper, using onion skins.  The blue eggs are from our hen Birdie--she makes 'em real purdy.  

image.jpg

If you haven't yet dyed eggs and are wanting to, you can find Ashley English's Naturally Dyed Eggs instructions here.  They are so easy and make such pretty colors!  

Happy Easter to all of you!  We'll be enjoying the weekend at home and with family.  I hope that wherever this weekend finds you, it finds you well.   

what i've learned from a year with chickens

A year ago today I picked up five baby chicks from Egg|Plant Urban Farm Supply and excitedly brought them home.  Being the reader and researcher that I am, I knew a lot going into this adventure, but there is nothing that compares to real life experience.  After a year of being a chicken mama, I feel that I can confidently say that I understand chickens!  Obviously, there is still more to learn.  But as for the basics, I've got them!  So, here's a little of the good and the bad that I've learned about raising chickens in the city...

image.jpg

Let's start with "The Bad":

  1. Chickens make a HUGE mess of your landscaping and gardens!!!  My aunt warned me about her chickens' habits of kicking mulch out of her flower beds...but I underestimated their destructive natures...by the end of last fall, they had turned most of my Hostas into shredded greens, kicked most of our mulch into the grass, dug holes in the yard, eaten my carrot tops which completely prevented any carrots from forming, helped themselves to the kale every time it finally got big enough for us to use, scratched in my ground covers, and pooped everywhere...literally everywhere.  What we learned was that free-range chickens and beautiful urban gardens cannot peacefully coexist without proper fencing and limitations...this year proper fencing and limitations will be added to our small little city lot and my dreams of a Better Homes and Gardens urban paradise will be renewed.
  2. Organic chicken feed is not cheap.  My friend Bre tried to warn me that keeping chickens and feeding them organic feed was not economical (when compared to just buying eggs).  I doubted her because at times my confidence levels in myself are a bit too high and I assumed I could find a cheaper way...well...I haven't.  There may still be a cheaper way, but I have yet to find one that easily fits into our current lifestyle (ie. dumpster diving may be cheap, but who's got time for that?!?!).  The truth is, feeding an organic diet to a small flock with little foraging space is not cheap, but for us, it's still worth it.  The eggs that we get don't compare in color or flavor to the most expensive local eggs that we can find at our co-op.  We could easily feed them for a lot less on conventional feed, and that would be cheaper than most grocery store eggs, but to us the cost is worth the benefits of the eggs we receive.
  3. They poop sooooooo much!!!  I was a bit unprepared for the amount of waste that comes out of their behinds...I thought it was a lot when they were chicks, but oh my, it has multiplied as they've grown!  As it has mostly been cold in Minnesota since they have become full grown, we have yet to fully experience their poop in the heat of the summer...so...I'll get back to you on how bad it really is.  Because, not only is there a lot of it...but it can get kind of stinky....so...stay tuned....
  4. They are louder than we expected.  We picked out breeds that were supposedly quiet and great for city life...but they still get a bit squawky at times, especially when they want out of their coop or want the food that someone else has.  However, when they are content, they quiet right down.  Our neighbors don't seem to mind, and compared to the neighborhood dogs, the chickens are hardly noticeable! 

Now, "The Bad" is kind of a bummer...but the good news is that "The Good" makes "The Bad" so worth it!!  So...here's "The Good":

  1. The eggs are amazing!!!  We constantly play the game of "guess which eggs are from our chickens" as we crack store-bought and home-grown eggs into the frying pan.  The color of our ladies' yolks is bright orange and they are so big and firm.  The amount of yolk compared to the white is fantastic.  You know how the white in store-bought eggs sometimes gets so stringy where you can't seem to get it to release from the shell??  That doesn't really happen with our eggs.  And when you drop them into the frying pan, the whites stay in tack and don't spread across the pan, making the most perfect fried egg.  Then there's the taste...yum...they are SOOOO flavorful!!!  The color also tells of their nutrients.  Because our chickens eat so many of our table scraps and good organic feed, their eggs are packed full of great things, which in turn nourish our bodies.  There is also nothing quite as lovely as the pretty collection of eggs varying in shades of brown and blue which sit on our kitchen counter.  Love, love.  
  2. They are very easy to take care of!  Besides strategizing ways to keep them from destroying the gardens, not much work goes into their care.  There are days when we do absolutely nothing with them, especially in the heart of the winter when the days are short. Most days, we check on them, gather eggs, give them a few scraps from the kitchen, and let them out into the yard.  Then about once a week we fill up their food and water and clean up their coop and run a little bit.  (Honestly...the cleaning doesn't always happen...and we all survive just fine....)
  3. They can survive a normal Minnesota winter without a heater.  We worried our way through through December and January as the temps and windchill dropped, but we decided not to heat our coop and are so glad that we didn't.  Our chickens did just fine in their insulated coop and with their 6-12 inches of straw bedding.  They are cold-hardy birds and they adapted to the cold temps that Minnesota threw their way.  Their egg production dropped and for January and February they pretty much stopped, but that's natural and normal for cold weather birds.  We did encounter a bit of frost bite on their red combs, but I'm hoping that I'll be able to better prevent that next year, now that I know when to expect it.
  4. They are SO MUCH FUN!!!  I can't even describe how much we enjoy these chickens.  They are hilarious.  They do funny and stupid things.  We could sit on our deck and watch them for hours.  We stand at our kitchen window and watch them perch in their run.  We laugh as they run for cover when geese fly overhead.  We hold them and pet their silky feathers.  We nervously laugh as they sing their obnoxious egg songs each day that they proudly lay their eggs.  We wake up and think of chickens.  We shut down the house for the evening and think about chickens.  We love having chickens.  THEY ARE SO MUCH FUN.   
  5. We are somehow working to make our broken food system better.  We still buy eggs in the heart of winter and still drive to the grocery store just as much as we did before...but we understand so much more about how food is grown and raised because of our chickens, which makes us so much more mindful about how we eat, use, and waste the food that finds its way into our kitchen.  With our compost pile and our chickens we don't really throw away any food.  In fact, we often bring our trash outside because it smells bad (from meat wrappings) long before it's full.  Wasting food is something that rarely happens in our house now, and I love that.  I makes spending money on quality food much easier to do--because the food all serves a purpose.  It no longer sits in our fridge for two weeks and then gets thrown into the garbage.  It's being used to its full potential--each and every bit of it.  

So, with all of that, we've both agreed that we'd do it all again.  We may do a few things differently, but we don't at all regret raising chickens.  It's been well worth the cost and time.  We even have two new chicks arriving in less than two weeks to add to our flock!  Urban chicken keeping is definitely for us.  And for that I'm so very thankful for the episode of The Splendid Table that I heard over 4 years ago that first introduced me to the idea of backyard hens.  Our ladies are a wonderful addition to our exciting and fun-filled lives. 

image.jpg

reusable living :: napkins

We live in a disposable society.  From dishes and bags to hygienic products and cleaning products.  It seems that every year more and more disposable options come on to the market promising to save us time in our busy schedules.  But...have you ever found yourself frustratingly out of paper towels or ziplock bags??  Have you ever been overwhelmed by the long list of items that you need to pick up at your neighborhood Target store??

I have a theory about this...my theory is that all of these disposable things don't really make our lives simpler.  When they are readily available, they can most definitely make things easier, but in the long run, I think they make our lives more complicated.  It's time consuming to keep all these different things in stock in your cupboards and closets, and speaking of cupboards and closets, all of those different disposable things take up a lot of space.  There's also the financial aspect--as cheap as they may seem, have you ever calculated how much money you spend every year on things that you use once and then throw away??  I think we would all be a bit disgusted with the numbers.  And let's not even get into the landfills that could be filled with disposable products alone...yeah, let's not go there. 

So, what do we do about it?!  As crazy as it may sound...there are lots of pretty simple solutions and a lot of them are things that our grandmothers and/or great grandmothers used to do...before the age of disposables.  Now, for many of us, life looks very different than it did for our grandmothers.  Rather than being home all day cooking, cleaning, and child rearing, many of us spend our days, or a portion of our days, working away from home and the times that we are home are packed full of housework, food preparation, and family time.  I get it.  The idea of adding one more thing to the washing list, be it dishes or laundry, sounds far from simple.  Yet, as crazy as it may sound, I do believe that kicking the disposable addiction can truly add a bit of simplicity to our busy lives.  

With that...I thought I'd start a series entitled "reusable living" with each post highlighting a different way to simplify your life by moving away from disposables and going back to the way things used to be done.  All of these things may not be for everyone, or even for you, but I do hope that you'll find one or two that may be helpful and inspiring.  

I thought I'd start this series with one of our favorite daily reusable: cloth napkins.  Now, if you grew up like me, cloth napkins were reserved for holidays and family gatherings.  Don't get me wrong, cloth napkins definitely class up a meal and make it special, but why can't we use them every day!?  Most would say that the reason is because they have to be washed and that adds extra time and tasks to our already busy schedules.  But, that's where I disagree for two reasons.  

  1. Napkins do not need to be washed after every meal.  In our house we each have a designated napkin and we use it until it starts to look like it needs washing.  Sometimes that's a week, other times it's after a messy meal.  Either way, they don't need to be washed after every meal.  With a small family, this means a set of napkins can last for several days.  Obviously, when guests come over you can wash their napkins after the meal, but for those in your house, wash as needed. 
  2. Napkins are super easy to wash.  Just accumulate napkins that can be thrown in with your bathroom towels, kitchen towels, or sheets and you're golden!  They don't need a load of their own and they hardly take up space in your washer.  If you have a few sets of napkins, it's easy to just wash them as you do your other laundry and the folding is slick as well.  

Why we love them:

  • They work so much better and are much softer than paper ones!  Use a cloth napkin while eating BBQ chicken...it will change your life--no more paper stuck to your sticky fingers.  
  • They make our dining experiences more formal and more special.  
  • As for simplifying our lives, I feel that they do that by eliminating the need for and space for paper napkins.  Instead of having both cloth and paper, we now just have cloth, which saves space and makes for less decision making, thus making things a bit simpler.  

A few tips:

  • For designating napkins for different people in your house, there are a few options.  You could have a different set of napkins for each person so that each person has their own design or color.  Or you can use a different napkin ring for each person.  That's our plan.  
  • If you don't already have a few sets of napkins, they are pretty easy to come by.  Look at discount stores for them or make your own.  For kids you could even make smaller napkins by cutting up and re-hemming larger ones.  You don't have to buy nice napkins to get started, just get some simple cotton linen ones and you'll be set.  
  • Dark colors or patterned napkins are nice as they don't show stains as much.  

Try it out!  You may fall in love and never turn back.