zero waste living :: grocery shopping

One of my resolutions for the new year is to reduce waste in our home.  I've been on this journey for the past few years, but this year I have decided to really make an effort to become as "zero waste" as possible.  If you are not familiar with the term "zero waste," I encourage you to read Bea Johnson's book Zero Waste Home.  In the book, Johnson lists 5 steps to zero waste living: Refuse, Reduce, Reuse, Recycle, Rot.  The order of these steps is very important, as the key to zero waste living is reducing the amount of waste you generate by getting to the source of the waste.  Zero waste living starts by examining everything that comes into your home through the lens of what happens to it once it leaves your home.  

So, I'd thought I'd bring you along on our journey to zero waste through a series of blog posts over the next few months.  We are far from living a completely zero waste lifestyle, but we have definitely reduced our waste over the past few years and I'm hoping to reduce it even more throughout this year.  The main way I'm tackling that right now is through grocery shopping.  I've found that so much of what we as a society throw away comes from the kitchen, whether it be from food packaging or food waste.  We compost most of our food waste or give it to our chickens, so the packaging is the main source of waste in our home.  To reduce this, I need to reduce how much of that packing comes into our home.  Here are a few of the ways I'm working to do that. 

  • Reusable Shopping Bags:  We all have piles of reusable bags floating around our homes that we've received for free at stores, fairs, events, etc, but I've found that for me I prefer to have just two sturdy canvas bags and a woven shopping basket.  The canvas bags hold more than the freebie bags and I value them more because they aren't freebies, which helps me to be more intentional about using them.  The basket keeps my jars and eggs from rolling around and it's so sturdy.  (The basket I have is a handmade basket made in Ghana.  It also works really well for bringing food to gatherings and on the road.)  I've started bringing my own bags not only to the grocery store, but to other stores as well.  Anytime I leave the house with a plan to shop, I grab a bag on my way out!
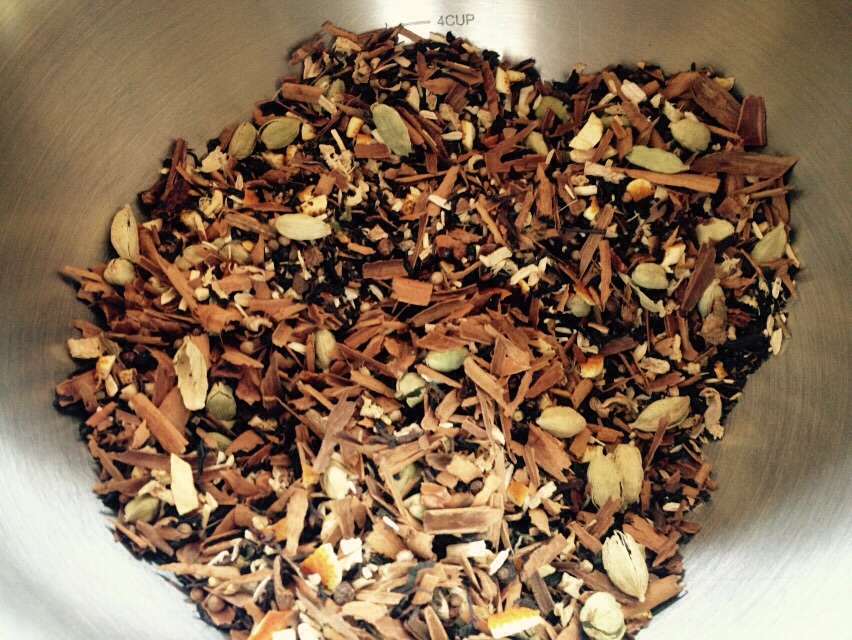
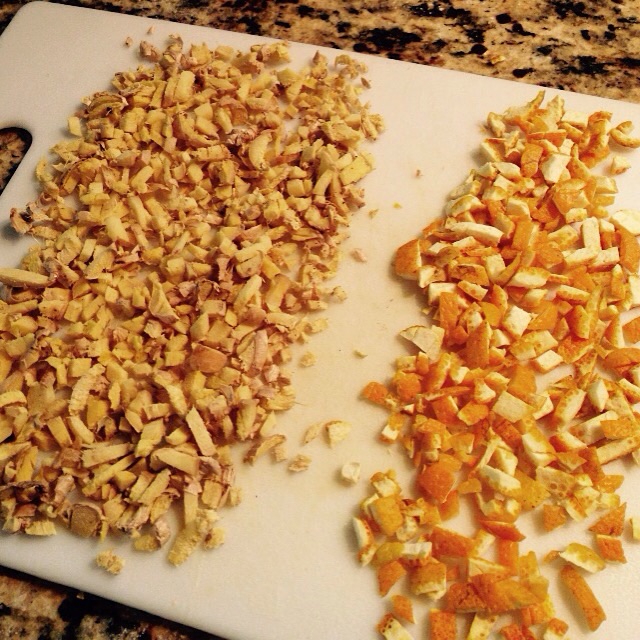
  • Shopping in bulk:  This is the main way that I reduce kitchen waste in our home.  By bulk, I don't mean shopping at Costco or Sam's Club, I mean shopping in the bulk isle at your local grocery store.  Buying in bulk reduces waste, especially if you are able to use your own containers, which can completely eliminate the need for waste to come into your home for those food items.  Our food co-op has a very large selection of bulk items including wet and dry items.  I realize that many do not have access to this large of a selection, but demand can drive supply!  I currently buy the following things in bulk: produce, eggs, flour, sugar, oats, barley, quinoa, rice, beans, nuts, seeds, dried fruit, pasta, peanut butter, maple syrup, apple cider vinegar, molasses, honey, herbs, spices, loose-leaf tea, baking soda, baking powder, salt, crackers, hummus (dried and fresh), coffee, and some candy. 
  • Bulk bags/containers:  Bringing my own containers has become one of my favorite parts of my weekly grocery shopping trip.  (I'm weird like that...)  It takes a few extra minutes to pull together my bags/containers before I leave the house, but it saves me time when I get back home and am able to just put them all back onto their shelves and don't have to worry about transferring things from packages into my storage containers.  I use a few different bags/containers for different types of bulk items.
    • mesh produce bags:  I bought a few of these a few weeks ago and love them!  Our co-op sells spinach and mixed greens in bulk and they work great for that! They also work great for things like mushrooms, green beans, snap peas, and even bigger produce items like apples, oranges, carrots, broccoli.
    • hemp/cotton bulk bags:  I made a few of these out of an old vintage sheet a few months back and then Dan bought me a few more for Christmas.  I love them!  I use them for produce like apples, oranges, onions, potatoes, and also for dried bulk items like flour, oats, beans, nuts, etc.  They work especially well when I have a lot of things to get and don't want to bring a bunch of glass jars/canisters with me.
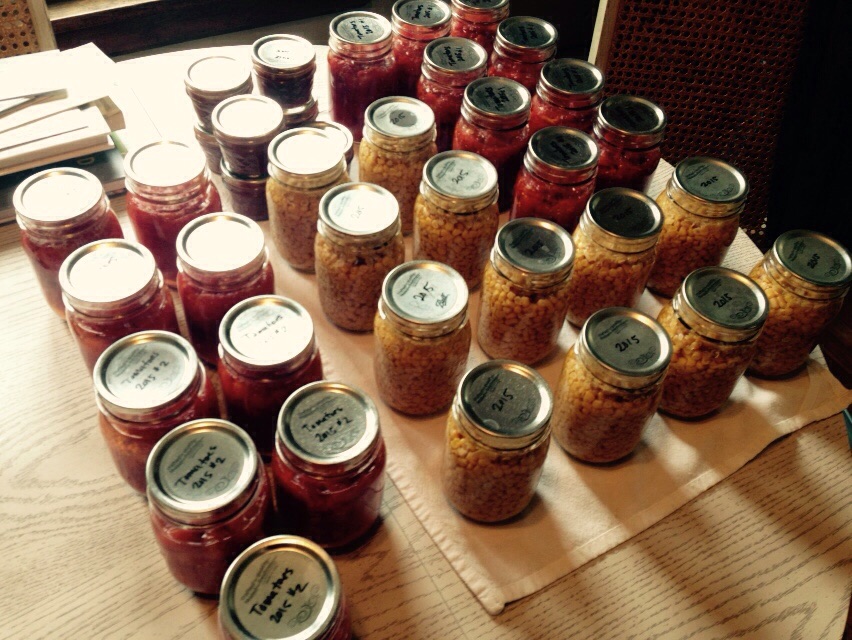
    • jars/canisters:  I store almost all of our pantry items in glass jars or canisters, and so when their contents get low, I bring them to the co-op and fill them up!  As I said above, some things I bring my jars for and others I use my bags for.  It usually depends on how much I need and how messy the item is.  I've found that for flour, it's nice to just fill up my canister.  However, my canister is really big and it's a pain to lug around, so I usually use a bag for flour and deal with the mess. 
    • egg cartons:  Our co-op sells bulk eggs and since our chickens are free-loaders right now, I've been buying a lot of eggs!  It's great to just keep using the same egg cartons week after week!
    • glass container for meat:  This past week I brought in a container to use at the meat counter for the first time!  Meat packaging is often what makes us take the trash out, as our trash usually gets smelly before it gets full, so using a glass container made me so happy to know that at least for one meal there would be no smelly packaging to throw away!
  • Label/weigh your bags/containers before you shop:  Using your own containers can take longer if you don't have a good system in place.  First, when you use your own container, you have to weigh it before filling it up.  This is called the "tare" weight.  For my bags, I have the tare weight written on all of them in permanent ink so that I can just fill them up when I get to the store.  For my jars, I like to put a piece of masking tape on each of the lids before I leave home.  I then weigh them quickly at the store before filling them up.  I could weigh them at home too, but I like the scale at our co-op better, so I just use that. I then write the tare weight and item number on the masking tape.  For my bags, I use one of the stickers at our co-op to write the item number on my bags.  Some people use crayons to label their bulk containers, which is truly zero waste.  I've thought about trying that, but for now, my system is working well and efficiently.  One thing to note: not all stores may let you or encourage you to use your own containers.  I recognize that I shop at a grocery store that values zero waste and that is not the case at many grocery stores.  However, that doesn't mean that it's not possible to use your own containers.  You just have to ask!  Ask at the customer service desk and if they say no, dig deeper!  Talk to a manager and politely explain that you're trying to reduce the waste in your home and you'd like to be able to use your own container.  It's worth a shot! 
  • Stay organized:  I've found that keeping my shopping basket in an easy to reach place in the kitchen makes staying organized and efficient a lot easier.  After I shop, I empty my bulk bags, throw them into the laundry if needed, then store them in my shopping basket in the kitchen.  As we empty an egg carton, it goes into the basket as well.  Then on shopping day, I make a quick loop around the kitchen and pull out the jars/canisters that need filling and decide whether to just fill the container or use a bag.  Keeping it all in one designated spot helps me to prep and get out the door a lot faster, which is vitally important when shopping with an 11-month old! 

How about you?  Are you able to shop with your own reusable containers?  Do you?  In what ways are you reducing waste in your kitchen??  I'd love to know. 

berries, a baby, and nap-time jam

I've dreamed for years about berry picking with my little ones.  Picking berries and tucking them away to be used all year is something that I'm rather passionate about and so the thought of sharing that with my children and teaching them about the importance of local, seasonal food has been something I've been looking forward to for years.  In my dreams I imagined picking berries for hours with a happy, little baby on my back.  The reality of that looked somewhat different, but in the end I did pick strawberries with a baby on my back and I'm so glad I did!  He wasn't too pleased about the whole back thing and a short morning nap made for a tired, fussy baby while picking, but he eventually fell asleep and my friend Amy and I were able to pleasantly pick berries and chat.   Over the years, I've found that the berry patch is a wonderful place for deep conversation.  Your hands are busy with a menial task and so it's easy to open up and really share what's going on in life and I love that.  

image.jpg
image.jpg
image.jpg

I ended up with 10+ pounds of strawberries and was able to go home that afternoon and put them all into their assigned places!  Three pounds went into the freezer to be used the rest of the year in kombucha, smoothies, and sauces.  Some were sliced up to be eaten with brownies and ice cream for a gathering of friends that evening.  Some were put into a second ferment of kombucha and others into a pint of vodka (Spiked Strawberry Mint Lemonade, anyone??).  Some were set aside for a pie.  Some were put in the fridge for fresh eating.  And the rest were made into jam!  Nap-time Jam, that is!  It's amazing what a determined mama can accomplish during a decent nap-time!  By the time that boy of ours had woken up from an afternoon nap, I had successfully washed, hulled, and put away all of the strawberries, made and canned jam, and cleaned up the kitchen!  Success!!  It felt amazing, I must say!  Now, if only all nap times were that productive!  

Strawberries!  I do love them.  And I love being able to enjoy their summer freshness all year round.  It makes their short season so very enjoyable. How about you?  What do you love to do with seasonal strawberries? 

image.jpg
image.jpg

pumpkin, pumpkin all week long

I get a little excited about holidays.  I think I owe it partially to my mom who instilled a great love for tradition and celebration in all of us, but I also think its because holidays mean time with family and delicious food and relaxation (at least in theory...I'm realizing that there is less and less relaxation in my adult-woman holiday life...ahem...I'm also not anticipating this getting any better with a little one on the way...).  I also find the winter holidays to be especially magical with the cold weather appearing, the possibility of snow, and candles and lights galore.  Nothing says cozy quite like the holiday season in the upper midwest!  

And so, with the start of this holiday season just days away, I've found myself more than a little a excited.  In spite of a nasty head cold that hit me on Saturday, our house is spotlessly cleaned and the Thanksgiving decorations and preparations are collecting in various areas of the kitchen and dining room.  Candles are burning and filling the house with the smells of the holiday.  And then there are things made from pumpkin.  We can't forget the pumpkin.  

This year I bought two pie pumpkins at our local garden shop.  They've been sitting in the kitchen since before Halloween and every weekend I've had plans to bake them and get them ready to be turned into something heavenly.  This past weekend was it!  And my goodness, did I underestimate the amount of pumpkin puree that those two things would produce!  I ended up with about 8 cups of cooked pumpkin!  So, the week started off with a batch of pumpkin muffins and will continue with two pies for Thanksgiving and hopefully a batch of pumpkin pancakes come Saturday (I'm thinking of giving this recipe a try)!  Hooray for pumpkin!  

How about you??  What are your favorite things to do with pumpkin at this time of year??

venison and beef enchiladas

I was asked over a year ago by a reader if I could share a few venison recipes.  Well, while we do eat a lot of venison, I often to stick to the usual suspects when it comes to recipes (roasts, steaks, stews, stroganoff, etc.)  This year, though, I think I'll be doing a lot more experimenting because we have quite a few pounds of ground venison now filling our freezer, since Dan got a buck in early September with his bow and we paid someone else to process it due to the warm temperatures.  Ground venison is an interesting type of meat...and I mean interesting in a true Minnesota Nice fashion.  To be more direct, I'm generally not a fan.  It tends to be gamey and a little tough (which makes sense considering that it is often ground from cuts of meat that are less than desirable).  In the past, I've tried making chili and tacos with ground venison and the leftovers have ended up going to the chickens.  

I think I'm learning the trick, though, to making ground venison work for me.  The key is to always mix it with beef (or pork).  So, two nights ago, I experimented with a venison and beef enchilada recipe and the results were great!  There was very little gamey taste and the texture was not an issue at all!  So, if you also find yourself with a freezer full of ground venison...here's a recipe you may want to try.  Of course, if you don't have access to venison, you can simply use ground beef.  Our enchiladas ended up falling apart because of the type of corn tortillas I used, but they still tasted delicious! 

Enjoy!


Venison and Beef Enchiladas

1/2 lb ground venison

1/2 lb ground beef

1 small onion, diced

1 small green pepper, diced

1 jalapeΓ±o, diced

2 cloves garlic, minced

1 tablespoon chili powder

1/2 teaspoon cumin

1/2 teaspoon dried oregano

salt/pepper to taste

8 ounces queso fresco

corn tortillas

green or red enchilada sauce (I used a jar of my salsa verde)

sour cream

Brown the meat along with the onions, green pepper, and jalapeΓ±o in a large skillet.  After a few minutes, add the garlic, chili powder, cumin, oregano, and salt/pepper.  Once the meat is fully cooked, add about 2/3 of the quest fresco, loosening it into small pieces.  Stir to melt and incorporate.  

Heat the oven to 350 degrees.  Pour some of the enchilada sauce into a pie plate or shallow dish.  Dip a tortilla into the sauce and coat both sides.  Scoop 1/4 cup to 1/2 cup of the meat mixture (depending on the size of the tortilla) onto the tortilla.  Gently fold the tortilla and place it with the seam-side down into a medium-sized casserole pan. Continue to fill the tortillas until you have filled your pan or used all of your meat mixture.  Pour the remaining enchilada sauce over the folded tortillas and sprinkle the rest of the queso fresco on top of the enchiladas.  Bake for 20 minutes. Serve with sour cream and your hot sauce of choice!

Serves 4.    

put up and put away

It's official!  The canning season in this house has come to an end!  My canning supplies have been crowding our kitchen for the last few weeks in hopes that a batch of apple butter would somehow find its way into my canner and onto my shelves, but this past weekend, I resigned myself to the reality that we're not going to have apple butter this year (nor any jam for that matter...darn strawberries and raspberries!).  And so, with that sigh of resignation, I moved the canner and it's accompanying parts back down to the basement and put them away.  Away until next June when the strawberries return and the gardens begin to once again produce their bounty.  

Along with that sigh of resignation, however, came a sigh of relief.  THE CANNING IS DONE!!!!  Hooray!!!!!  This means that winter is on its way and with it will come a much slower pace--quieter weekends, quieter evenings, and more time to knit, sew, and read.  Yes, a sigh of relief, indeed!  I love August and September and my many hours spent in my kitchen prepping veggies and such in order to preserve them, but after awhile, it gets a bit exhausting to plan my life around ripe tomatoes and the like.  The freedom that follows putting that canner away is quite lovely--not to mention the shelves full of preserved summer goodness!  

This summer, I was able to put up jars of tomatoes, tomato soup, tomato sauce, salsa verde, corn, applesauce, pickled tomatoespickled cucumbers, pickled mixed veggies, and fermented jalapeΓ±os, as well as a gallon of frozen blueberries, a gallon or so of frozen green beans, and a few different types of dried herbs.  Running down to the basement to grab some of that home-preserved goodness never gets old!  I find it rewarding each and every time I open a jar, add its contents to a meal, wash it up, and put it back on the shelf for next summer.  It feels so fulfilling, so resourceful, and so very satisfying.  

Yes, putting away the canner for the season is good, but by the time next summer comes around, I'll be very ready to take it back out again and start the process over.  

when life is too busy to pick the beans...

...the beans get really big.

image.jpg

It's been a week of really big beans around here.  With a busy holiday weekend spent with the best of friends and the start of the fall semester, there has hardly been time to sit down, let alone pick the beans!  And because of that, I just washed and froze a quart of rather large beans.  They won't taste the best and the texture may be a bit strange, but they will still nourish our bodies in the middle of winter and that's what's really important.  

So, with the summer behind us and the fall in full swing, I wish you all the best as you find yourself with maybe a little less time than you had a week or two ago.  There is something about fall that brings more regular commitments to the table, which can be lovely and bring such a good rhythm to our lives, but it can also mean that some things, like the beans, get a bit overlooked in the hustle and bustle.  So, as you fill your days with things, I hope you are still able to find ways to nourish your bodies and souls, even if it's with slightly overgrown and less than perfect beans.  

Cheers to fall!  And cheers to you, my dear readers.  

tomato soup

I've said it before, but soup is one of my favorite things to can.  There is nothing quite like grabbing a jar of soup from the basement on a cold winter's night and having a homemade dinner ready in a matter of minutes.  Throw a crusty grilled cheese in there and you've got a perfect comfort food!  If you are looking for a tomato soup recipe, here is the one that I came up with this year.  I'm rather excited about!  I made a double batch and ended up with 6 quarts.  However, I probably could have let it cook down a bit more so that it was a little thicker.  I think the little bit of sugar helps soften the acidity of the tomatoes and wine.  Add more or less to taste.  Enjoy!!

image.jpg

Tomato Soup

12 cups of peeled, cored, and chopped tomatoes

1 large onion, chopped

1/2 cup dry wine (I used a chardonnay, but a red would probably add an even better flavor)

2-4 tablespoons fresh basil, chopped

2 cloves of garlic, chopped

2 tablespoons unsalted butter

1 tablespoon sugar

1 teaspoon salt

ground pepper to taste

Melt butter in a large stock pot.  Cook onions in the butter until translucent.  Add garlic and cook until fragrant.  Add tomatoes.  Bring to a boil, reduce heat, and simmer for 30-40 minutes.  Turn off heat and let cool for a few minutes.  Using an immersion blender, blend until smooth (or blend in a regular blender in small batches until smooth).  Add wine, sugar, salt, pepper, and basil.  Simmer until reduced to desired consistency.  

Pour into clean jars.  Either freeze or can.  Pressure canning is the preferred canning method for soups.  Process the jars at 11 pounds for 25 minutes.  

When ready to serve, add a bit of half and half or heavy cream to thicken and make it creamy.  Yum!

Yield: 2-3 quarts

for crisp mornings

The end of my summer vacation will soon be coming to a close and over the past week I've started to feel the pull of routine calling my name.  During the school year, I love drinking chai tea in the mornings.  Whether I drink it in my living room chair or during an early morning class, I love starting my days with it's spicy sweetness.  In preparation for the fall semester, which starts for me in just over a week, last week I made a batch of my loose leaf chai tea.  When I mixed up this batch the weather was hot and humid and rather unpleasant, but yesterday and today we've been graced with a bit of cool crispness.  As the rain fell this morning I was able to sit in my living room chair and sip a warm cup of chai with a bit of yarn in my hands for a bit before getting my day started.  It was delightful.  

image.jpg
image.jpg

image.jpg

Cinnamon Ginger Chai Tea

1 pt cinnamon sticks, broken into small pieces

1/2 pt darjeeling tea

1/2 pt ginger root, chopped & dried

1/2 pt cardamom pods, slightly broken to release the oils

1/4 pt shatavari root (optional, it's a fabulous root that supports the female reproductive system)

1/8 pt coriander seeds

1/8 pt whole cloves

1/8 pt orange peel, chopped & dried

1/16 pt black pepper corns, slightly crushed

Combine the ingredients in a large bowl and mix well.  Store in an airtight container.  Use about a teaspoon for an 8 ounce drink.  Steep for 5-10 minutes.  The roots in the tea usually require a longer steeping time to really release their flavor.  Add a bit of honey and cream to taste.  Sip and enjoy! 

image.jpg
image.jpg

I love this recipe because it's so easy to tweak depending on the flavors you love (or those you don't).  I also like that you can add as much tea as you want, meaning you can control the caffeine, which I love.  I get all of my loose herbs and the darjeeling for this recipe (besides the shatavari root) at our local food co-op.  You can also order them all from Mountain Rose Herbs if you are unable to find them locally for a good price.  The cost of this tea should be about the same as if you were to buy an equal number of high quality chai tea bags.  So, if you are finding that the herbs at your grocery store are too expensive, look elsewhere.  Herbs, in general, should not cost $4-5 for a tiny little container! 

As for drying the orange and ginger, if your kitchen is dry and not humid, they will probably dry just fine if you leave them out on the counter overnight.  You can also dry them in a low temperature oven for 20-30 minutes, or until they are fragrant and feel dry to touch.  

I hope you enjoy this recipe as much as I do!  It's getting me excited for fall, which will be here before we know it!